Ask a child or teenager which phone or tablet they want, and they’ll probably say an iPhone or iPad. In fact, an American Community Survey (ACS) report states that households with children were 22 percent more likely to have a tablet device than households without children.1 As for Apple products, Piper Sandler surveyed over 9,000 teens and found that around 87 percent had an iPhone and 88 percent were planning on getting an iPhone as their next phone.2
Apple knows this and has positioned itself as the top mobile device choice for kids and teenagers. It also does a great job of protecting user privacy and digital well-being. That includes offering a robust set of resources for controlling how adolescents use their devices so we can better protect them.
But how do you set up those parental controls? Where do you even begin? The parents in our cybersecurity department are going to show you the exact steps they take when setting up their own kids’ iPhones and iPads so you can set your kids’ devices up like the pros.
Parent’s Apple ID or New Apple ID?
Whether you bought your youngster a new Apple device or upgraded yours and gave them the old one, the first step is to set up the Apple ID. But here’s where most folks get confused: Should they use their Apple ID to sign in or create a new one for their child?
For the purpose of setting up parental controls, the most ideal route is to create a new Apple ID for the child but only through the Family Sharing feature. Apple’s terms of use actually don’t permit children under 13 to create an Apple ID for themselves,1 so the parent or guardian has to set it up. For verification, the parent must set up Family Sharing through a device logged in with their own Apple ID. Don’t worry, we’ve outlined how to do this with step-by-step instructions below.
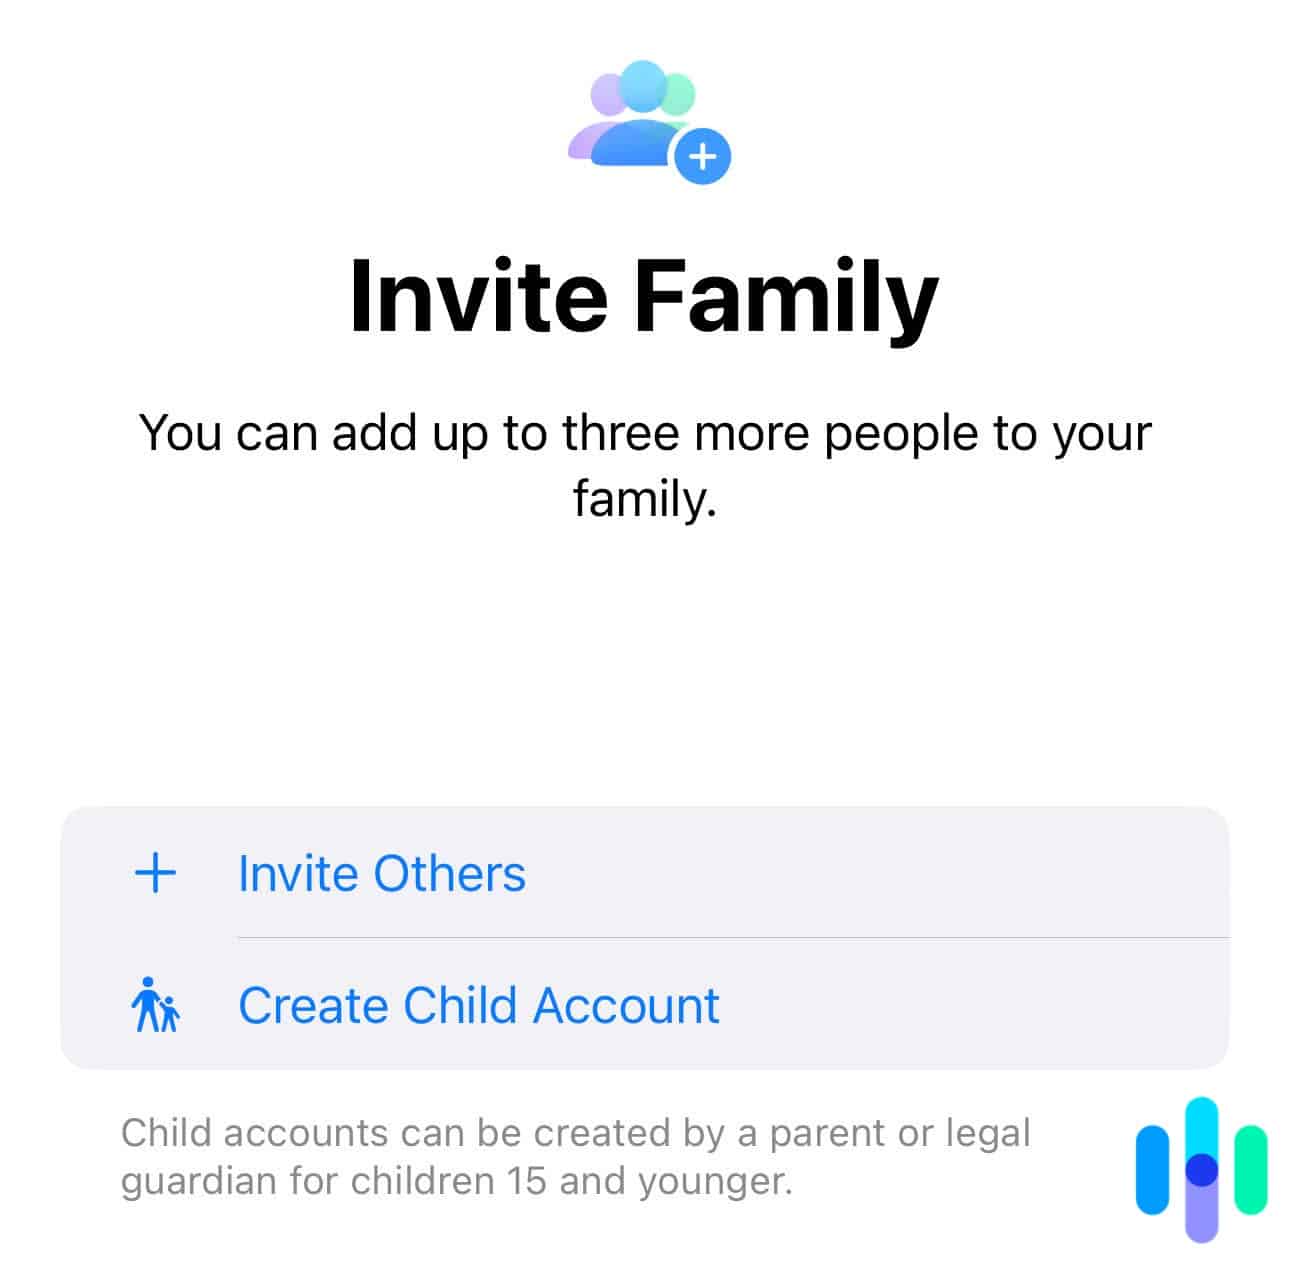
Here’s how to create an Apple ID.
- On your iPhone or iPad, open the Settings app.
- Go to “Family” under your Apple ID.
- Select “Add Family Member” in the upper-right corner of the screen.
- Tap “Create Child Account.”
- Enter the child’s name and date of birth.
- Follow the rest of the on-screen instructions to finish setting up.
Pro Tip: Be sure to enter the correct birthdate, because you can’t change it once the Apple ID has been created. When your child turns 13, they will be given more control over their Apple ID and iCloud account.
After creating your child’s Apple ID, you can set up some parental-control features then and there. That’s part of the seamless experience iPhones and iPads provide. We always set app download permissions and create screen-time limits at a minimum.
Don’t worry, we’ll go through those features one by one. The next section is about Screen Time, an Apple feature that goes a long way toward keeping your child’s iPhone or iPad kid-friendly.
Screen Time: The Gateway to Parental Controls
Screen Time is Apple’s ultimate parental control tool. Its primary function is setting a screen time limit, but it also lets you create content filters to protect your kid online.
Start, of course, by turning on Screen Time in the Settings. Just scroll down to Screen Time, turn it on, and follow the on-screen prompts. You can do this from your iPhone or iPad or from your child’s device.
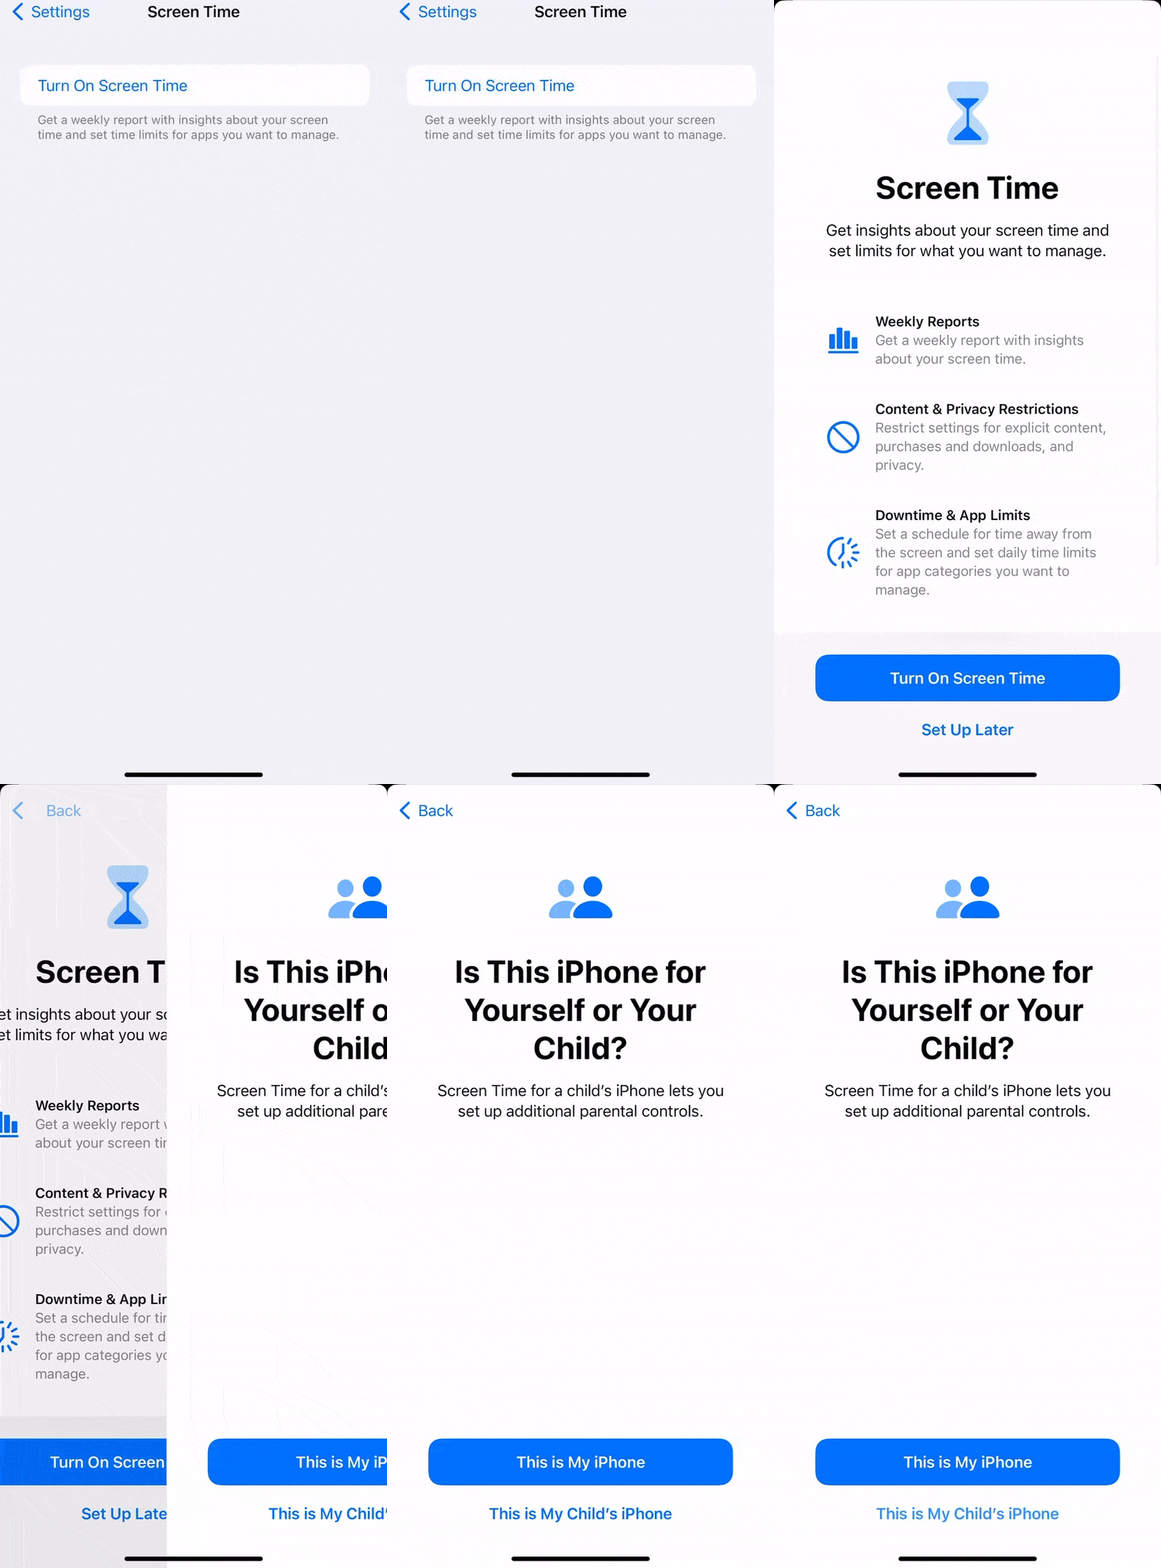
At the end of the process, you’ll set up a Screen Time passcode. You’ll use the passcode to edit your Screen Time settings, so it should be different from the passcode used to unlock the iPhone or iPad. You should also keep the Screen Time passcode under your hat to prevent your tech-whiz youngster from changing the settings.
Content Filters
Once Screen Time is on, you’ll gain access to content restrictions. The ability to filter content is one of the reasons parental control is necessary, so you should set aside some time to customize this feature.
A smartphone or tablet is your youngster’s gateway to the internet, and it can go downhill very fast if you don’t set up content filters. They’ll be able to download apps that are not age-appropriate or even apps that are dangerous to them. Inappropriate search results may turn up even from seemingly innocent search keywords. Even Siri, with all its wisdom, can give disturbing answers to random questions.
Did You Know? Siri has a flirtatious side, and asking questions a child may be curious about may trigger a suggestive response. Turning off Siri on a younger child’s iPhone or iPad may be a good idea.
One thing to remember is that content filters on Screen Time affect only Apple’s services, which includes the App Store, iTunes content, Safari, and Siri. It doesn’t affect content from third-party apps such as Netflix, Chrome, and YouTube Kids. You can set app limits which we’ll get into in a bit, but that only limits the amount of time your kids can spend on any specific app. It doesn’t limit the type of content your kids can view in a specific app. With that said, most apps have their own account-based parental controls you can use.
There are actually two ways to edit content filters. While setting up Screen Time, it will ask you to set up high-level restrictions. Alternatively, you can set your child’s age using the slider and it will adjust the settings to recommended levels.
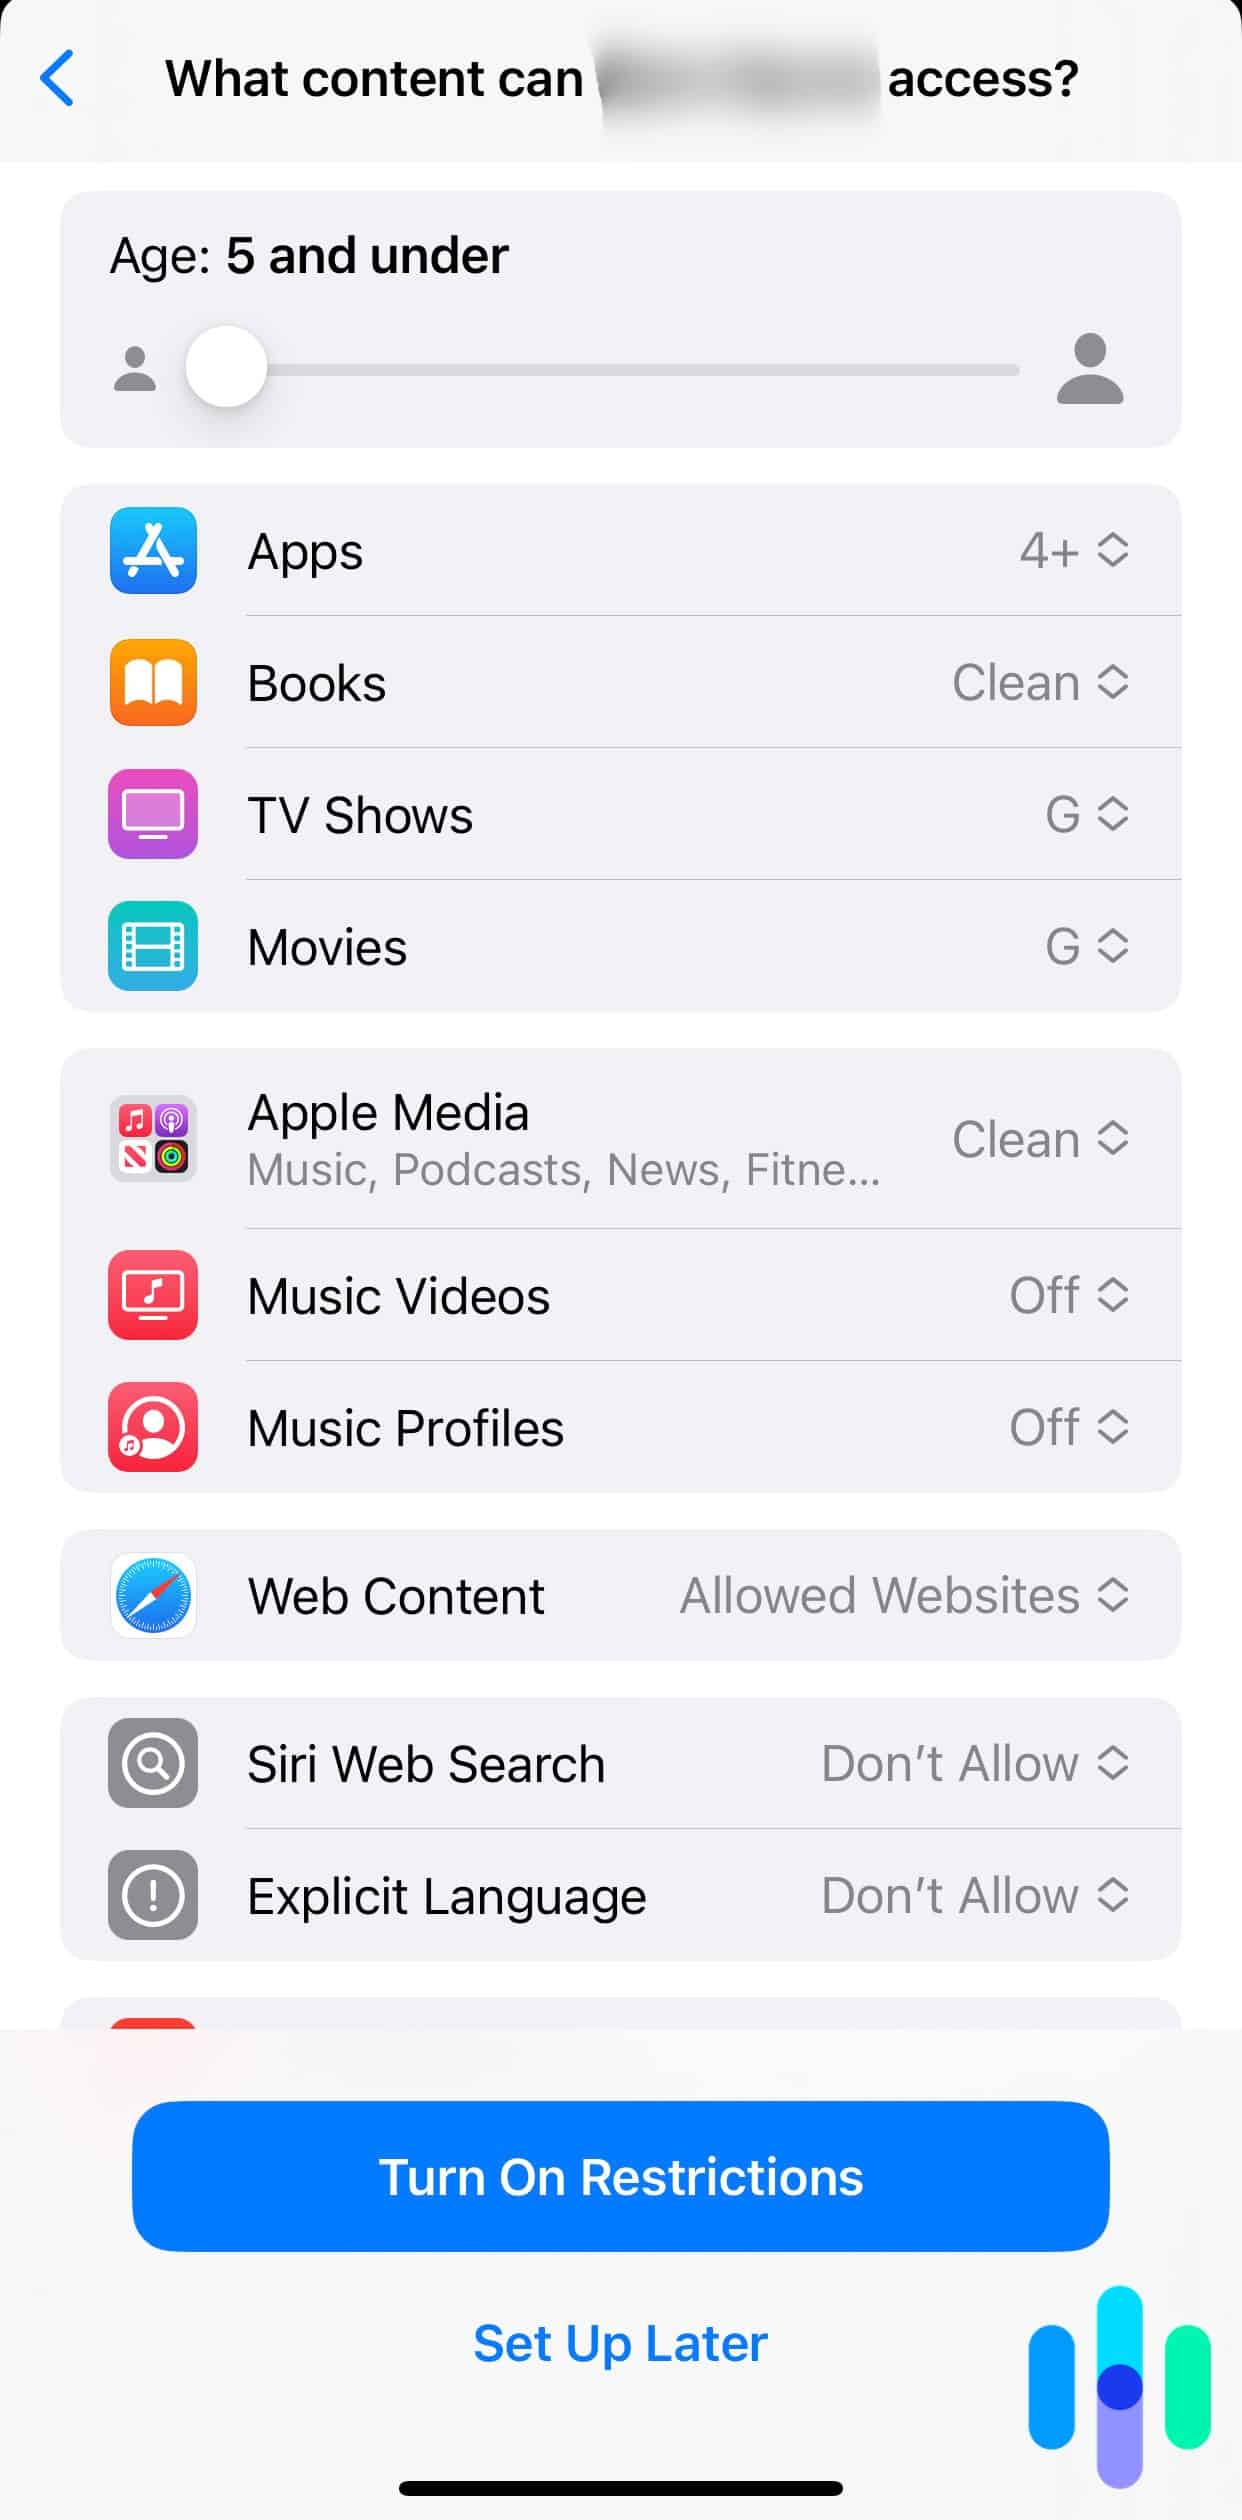
If you want to really get into it, you can skip the part above and access more detailed content-filtering settings once Screen Time is set up. Just open Screen Time in the Settings app and look for Content & Privacy Restrictions.
You’ll be able to fully customize the restrictions. You can set up age restrictions for downloadable content; allow or deny access to location, microphone, and other device features; and much more. We recommend going through the entire list of restrictions one by one to make sure you’re in full control, but here are a few ideas for things to set.
- Web content: You can limit Safari to allow only a list of websites hand-picked by you. For older kids, Safari can filter adult websites but allow everything else.
- Turn Siri on or off: If you’re worried Siri may be bad for your kid, you can turn it off completely. Otherwise, you can restrict Siri from being used to search the web or have it filter explicit language.
- Online games: Game Center lets your kid play multiplayer online games with other iPhone users online, but you can limit with whom they are allowed to be paired to just friends. You can also turn off multiplayer matching completely.
- Location services: See which apps have access to the iPhone or iPad’s location data, and edit their permissions as well. You can also turn off location services for all apps.
- App Store purchases: You can set whether installing apps, deleting apps, and making in-app purchases is allowed on your child’s device. You can also set it so a password is required when buying or installing apps.
Did You Know? In 2020, a child reportedly spent $16,000 on in-app purchases without his parents’ knowledge.2 To prevent this from happening to you, it’s best to turn off in-app purchases completely.
Downtime
The next part is for your child’s digital well-being. We can all agree that too much screen time is bad for their mental and physical health, so setting limits is a must.
With Apple devices, screen-time limits are taken to the next level. You can schedule Downtimes, for example, a period of time wherein the iPhone or iPad’s features are limited only to what you allow. You can use it to create a regular bedtime routine for your kids, especially on school nights.
Once Downtime is turned on, the prompt pictured below will appear when they try to open an app.
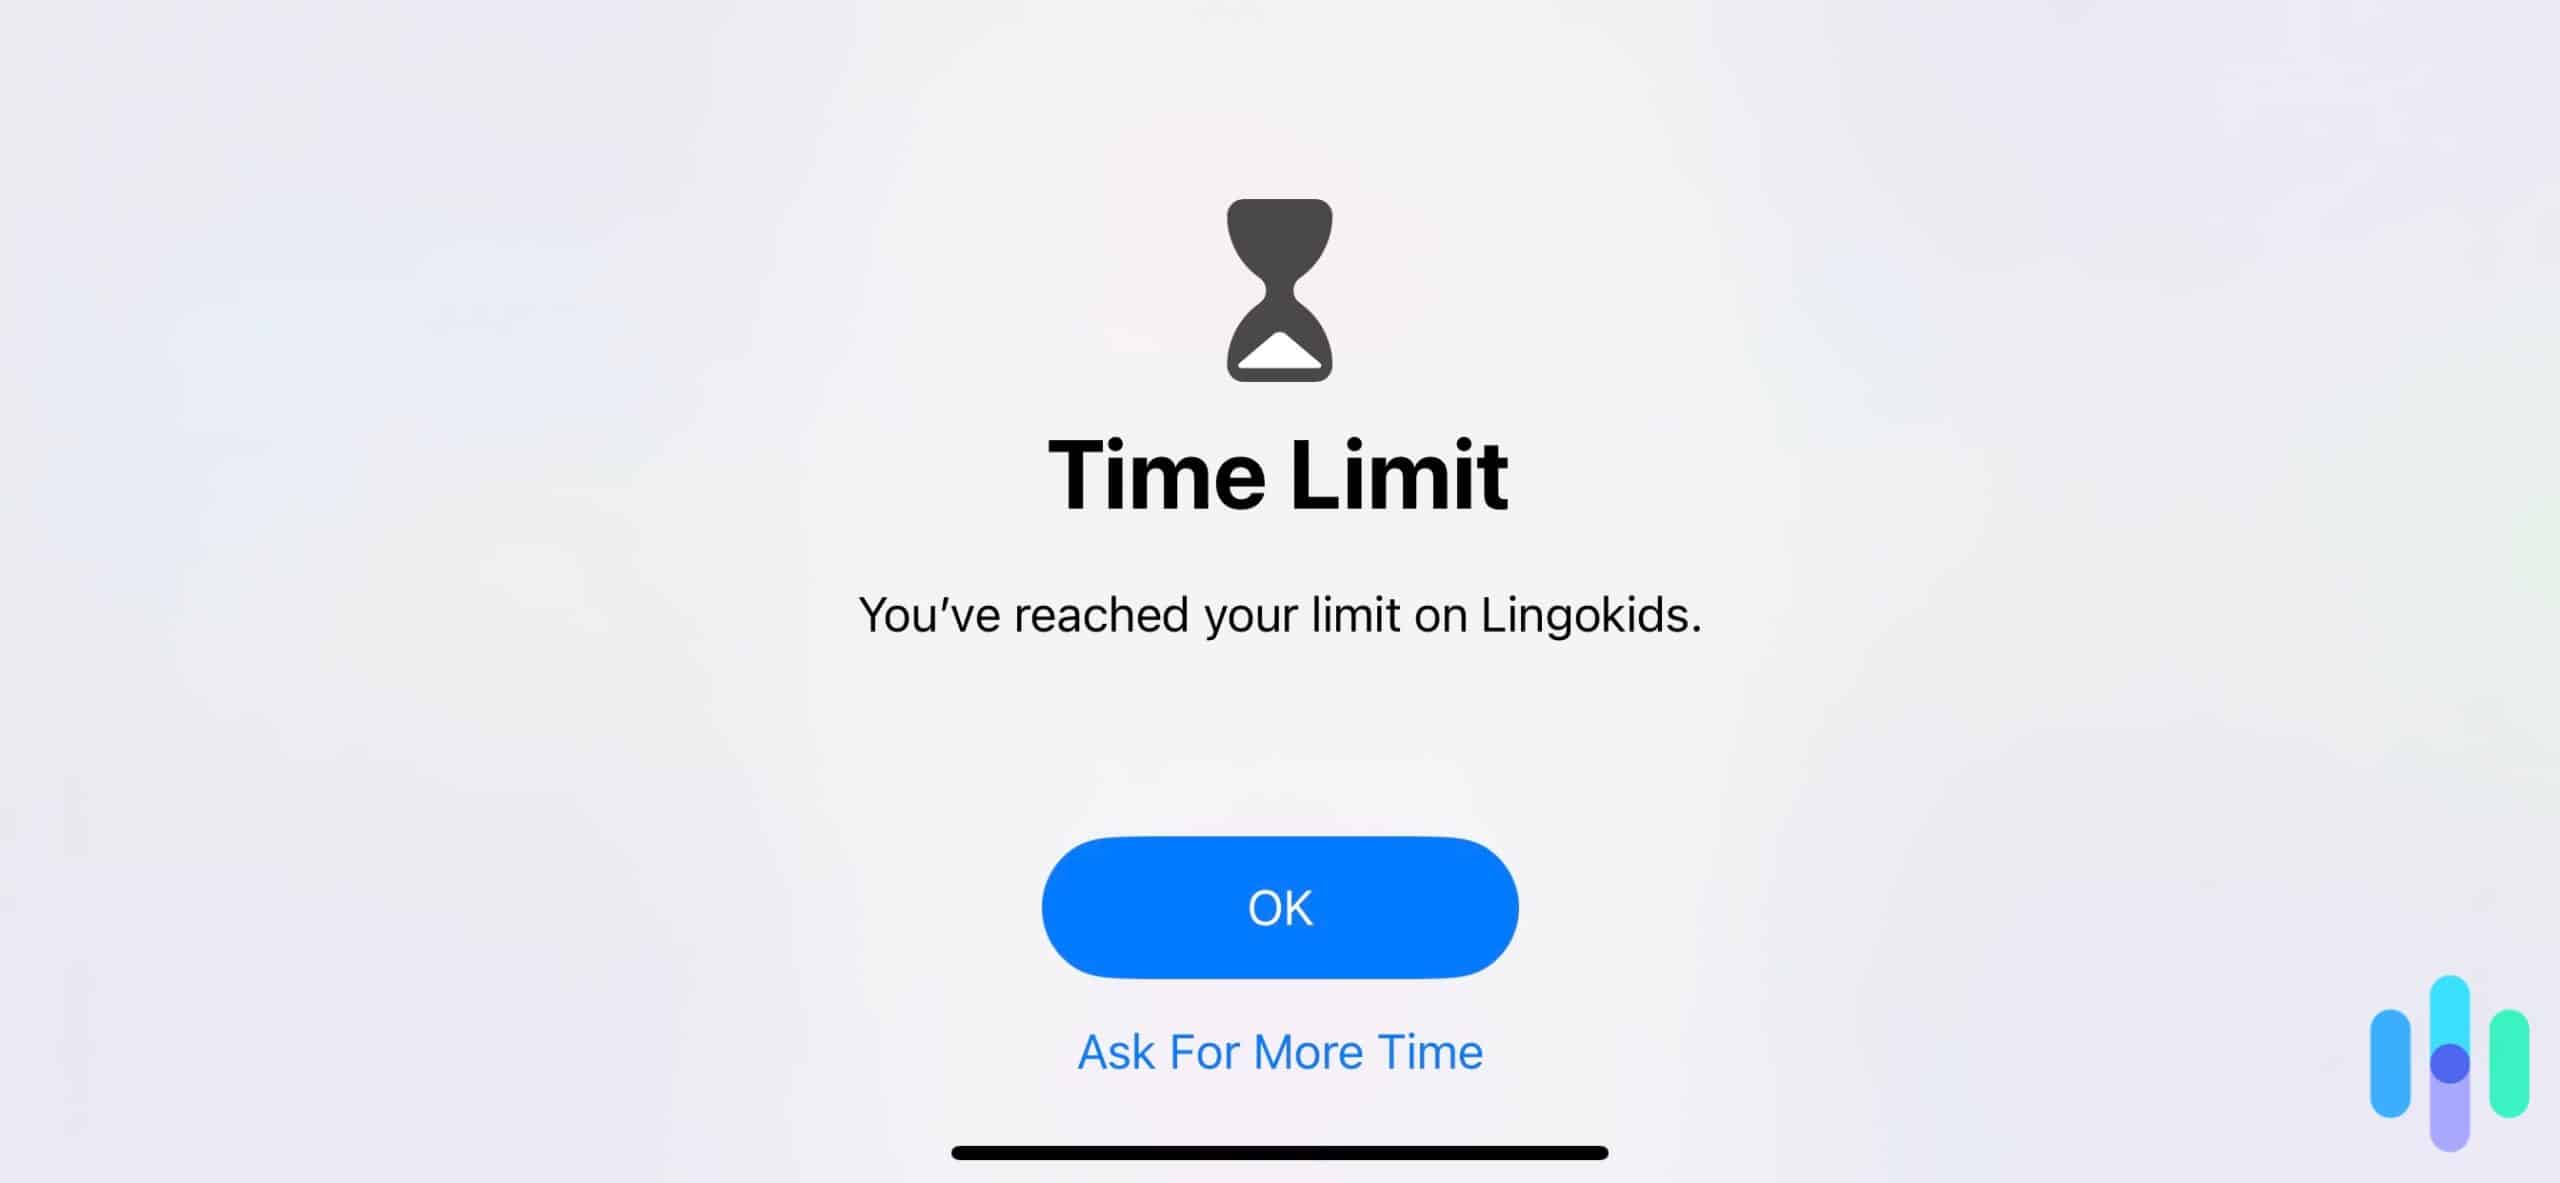
By default, they can keep ignoring the time limit by pressing “Ask For More Time,” but you can prevent that by turning on Block at Downtime. Here’s how:
- Go to Settings and open Screen Time.
- Select Downtime.
- Enter your Screen Time passcode.
- Toggle the “Block at Downtime” button.
After that, they will only be able to extend the screen time once for one minute in case they’re doing homework or something important. If they attempt to bypass the limit again, they’ll need your Screen Time passcode.
FYI: You can allow your kid to use certain apps during Downtime. They can still use FaceTime or Messages, for example. You can, however, limit with whom they are allowed to communicate during Downtime. For instance, you can set it so they can still call or text you but no one else.
App Limits
Aside from Downtime, you can limit how much time your youngster spends on an app, which is really useful in limiting their use of social media and mobile games.
This feature is under Screen Time in the “App Limits” section. The apps are categorized for your convenience, and you can even limit entire categories at once.
Next, you’ll have to set how much time they are allowed to spend on an app or type of app per day. You can also customize the time limit per day, such as fewer hours on weekdays and an extra hour on weekends.
Once they reach the limit, a prompt will appear similar to the Downtime prompt.
Norton Family helps you set device time limits, reduce online distractions during homework, and stay informed on what your children are doing on the internet.
Conclusion: Are iPhone and iPad Parental Controls Enough?
Apple devices have some of the most comprehensive parental controls among mobile operating systems, but they’re far from perfect.
Teenagers know to use third-party browsers to bypass Safari web filters, for example. Of course, you can tighten the grip and take away their iPhone’s ability to download apps but remember: Setting parental controls isn’t about being in control. It’s about keeping our children safe. If you catch your child trying to bypass parental controls, discussing why these features are in place may yield better results than just adding more restrictions.
Overall, iPhone and iPad parental controls are enough for most, but there are plenty of parental-control software options available in the App Store if you need a tighter handle on things.
Related Reading: Best VPNs for iPads
FAQs About iPhone and iPad Parental Controls
Read on for our take on some of the most frequently asked questions about iPhone and iPad parental controls.
-
Can I monitor my child’s screen time on an iPhone or iPad?
Yes, you can monitor their device usage by heading to Settings, then Screen Time. The graph at the top tells you the average device usage time per day, and tapping “See All Activity” shows you a more detailed breakdown of how much time they spend on each app.
-
Can I track my child’s whereabouts using their iPhone or iPad?
Yes, you can track your child’s location if they are a part of Family Sharing and location sharing is turned on. This feature, however, requires that your child’s iPhone or iPad be connected to the internet.
-
Can I remotely control my child’s iPad?
You can’t remotely pilot your child’s iPad, but you can turn on Screen Time remotely using your device. You can even activate Downtime at will.
-
Will using parental controls protect my child’s identity?
The parental controls on iPhones and iPads are designed to keep your child safe online, and there are a few features that will help you protect their identity, personal information, and privacy. You can set up app restrictions, for example, to prevent them from downloading apps that may compromise their data. You can also turn off features such as location services and microphone, or edit apps’ access to these features.
-
Can I manage my child’s iPhone parental controls from an Android device?
Unfortunately, you can only manage iPhone and iPad parental controls from another Apple device. You can still set up parental controls on their device, but approving apps and time-limit extensions, for example, requires another Apple device with your Apple ID signed in.


